
Apart from Start Orb and classic Start Menu, Windows 7 users test driving the new OS miss the ability to create an ad-hoc wireless network. If you network then you probably have noticed the absence of the option to create such a network in Windows 8 to share files and internet connections. The ad hoc feature of windows 7 merely creates a separate network with similar ip addresses so that other devices may connect to a virtual network. Allowing users to connect to the internet via the routers DNS configuration. Although the new OS comes with Internet Connection Sharing (ICS) allowing other devices to use the internet through your host’s internet connection, there is no option for this to be a wireless connection. In the following tutorial I shall show you how to create such a network in a Windows 8 environment.
Wifi Hotspot in Windows 8
Using Windows Netsh Utility
The Network Shell (netsh) utility is essentially just a tool majorly used to configure network devices in different editions of windows. The support for configuring WLAN using netsh was first introduced in Windows Vista, and it’s now available in Windows Server 2008, Windows 7 and Windows 8. By the netsh wlan command, the hosted network option can be easily used to create an ad hoc wireless network. The Hosted Network is WLAN feature is designed to implement virtualization of physical network adapter. Because it is essential in creating a virtual wireless device, it is used in a wide array of network virtualization devices, such as Virtual WiFi Router, MyPublicWiFi, Marfi etc. So, provided your NIC supports wireless hostednetwork features, you may make your pc a wi-fi hotspot by way of an ad hoc wireless connection.
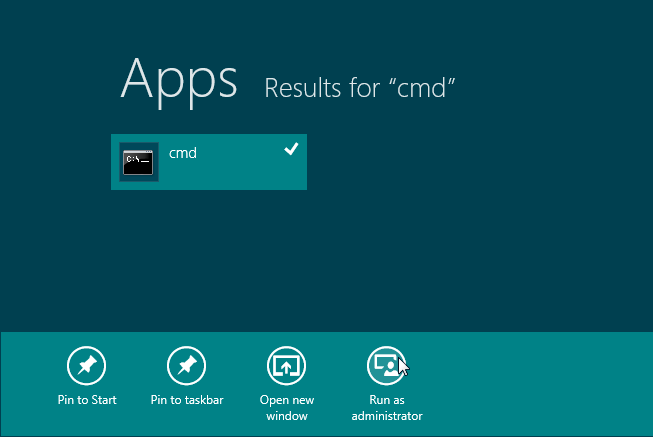
Both the OS’s support network configuration of wirelessly created networks made using netsh commands. To create a virtual wireless connection by way of the netsh utility, firstly run command prompt with admin privileges. Goto Start Menu> Type in search bar “cmd” and hit enter.
First step is to check whether your device supports ad hoc connections or not. For this type in the command window:
netsh wlan show drivers
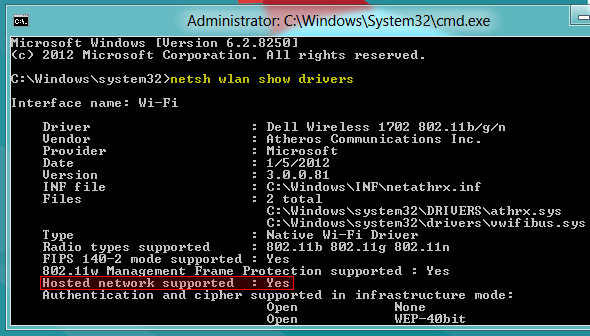
In the case it says no, you shall have to update your devices driver. When you have support you can move on. To configure the wireless connection type in:
Space
netsh wlan set hostednetwork mode=allow ssid=<network name> key=<passkey>
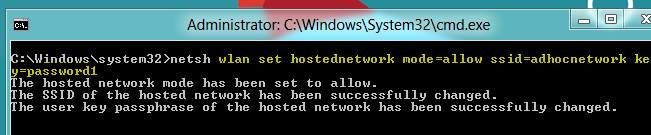
Once you allow the new network you can set the vitualization option to deem it an ad hoc connection. To do this type in the command window:
netsh wlan start hostednetwork
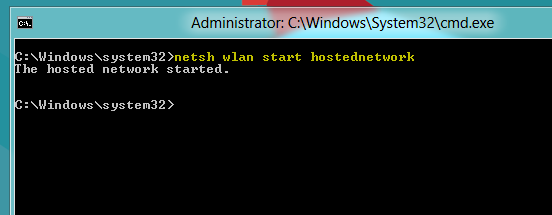
If it says “hosted network couldn’t started”, disable all current wireless devices and try again. Furthermore you may also need to refresh your Device Manager list to install this virtual devices driver.
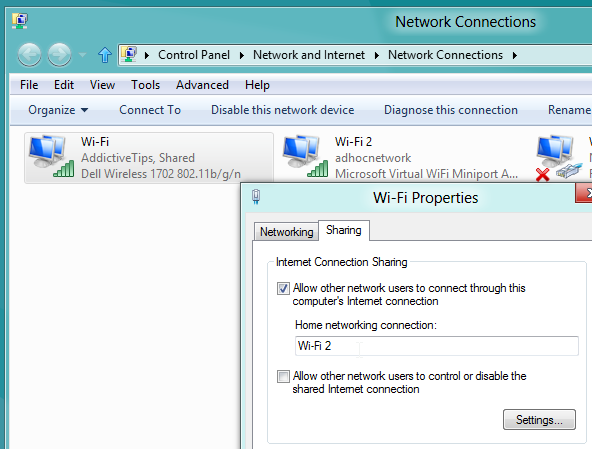
Once the new host network is up and running, turn on ICS for this new network, to allow other devices to connect to the internet through your internet connection. To enable this ICS option simply go to Network and Internet –> Network Connections, and open Properties dialog of network device (which is connected to internet). Next, open Sharing tab, enable Allow other network users to connect through this computer’s Internet connection option, then choose your new hosted network from the list.
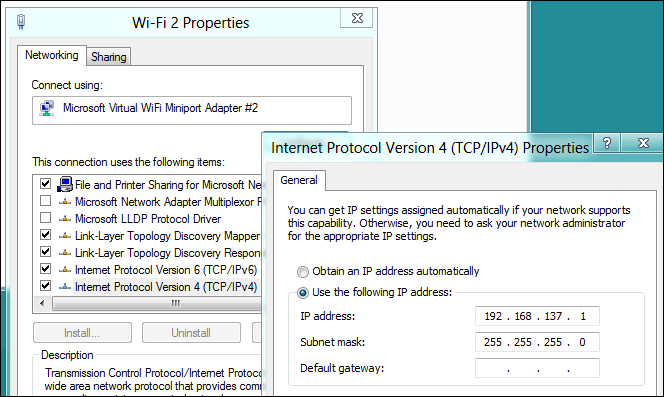
Once this is done check the new connections IP settings from the TCP/IPv4 Properties. If IP addresses are not assigned then run the following command in command prompt:
netsh wlan start hostednetwork
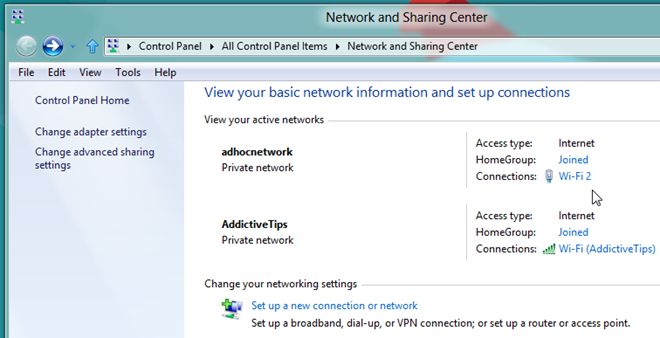
Once this is all completed now you shall be able to access the internet through a wireless virtual network on your Windows 8 PC. As shown by the screenshot below.
To manually turn the Hosted Network off, enter the following:
netsh wlan stop hostednetwork
To see the Hosted Network details (see Figure 3), including the MAC addresses of connected users, enter the following:
netsh wlan show hostednetwork
To change the WPA2-PSK key, you can enter the following:
netsh wlan refresh hostednetwork YourNewNetworkPassword